Raise Invoice User Guide – Raise Invoice
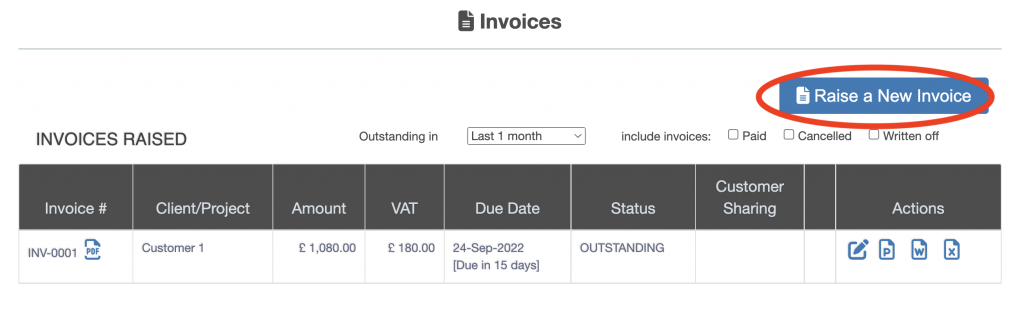
From the left hand menu select “Raise Invoice”. The “Raise Invoice” is displayed. Press the “Raise a New Invoice” button (circled in red below).
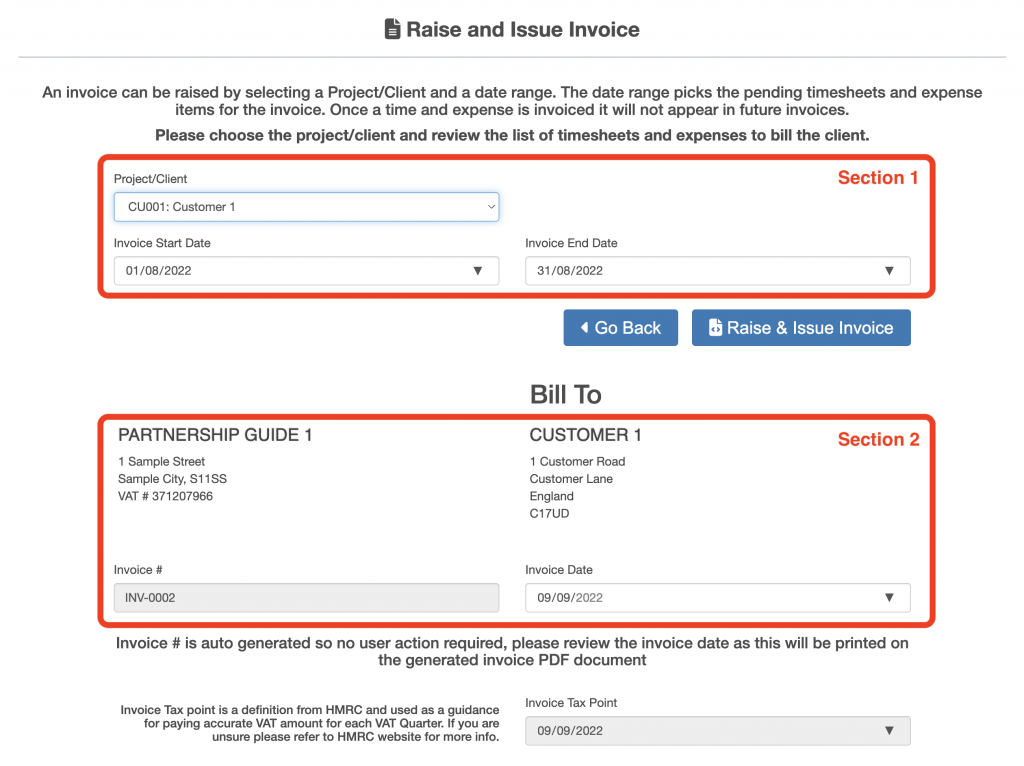
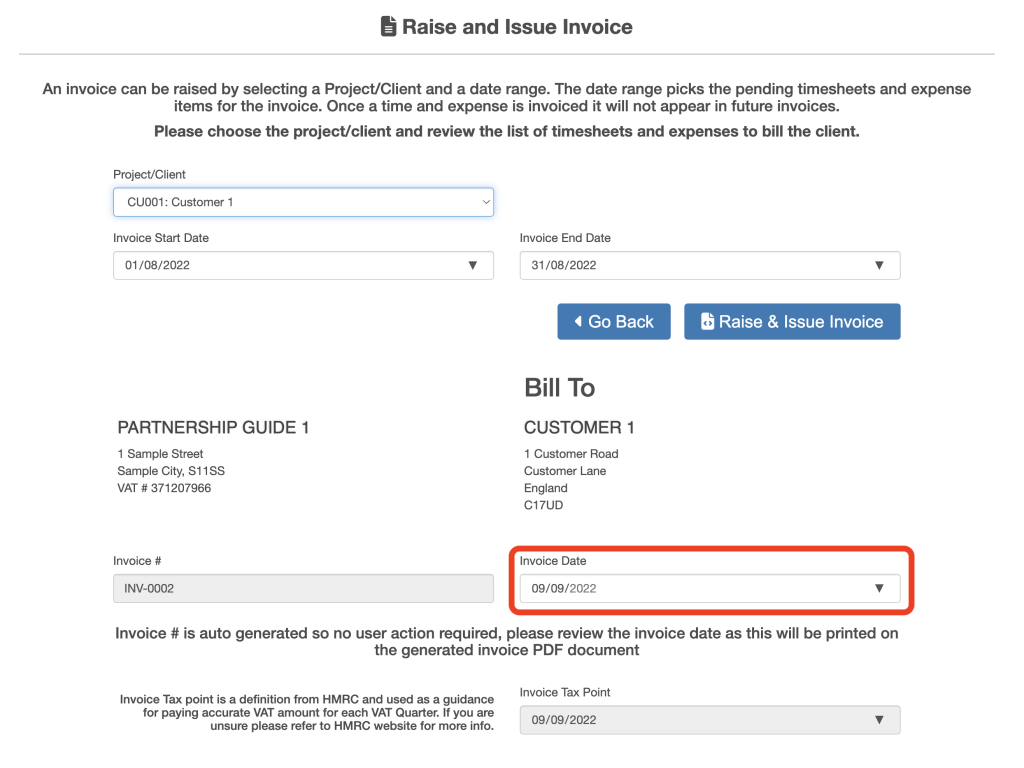
The “Raise and Issue Invoice” screen is displayed. The screen is broken into 5 section:
- Section 1, project/client to be invoiced and invoice dates
- Section 2, billing details and invoice date
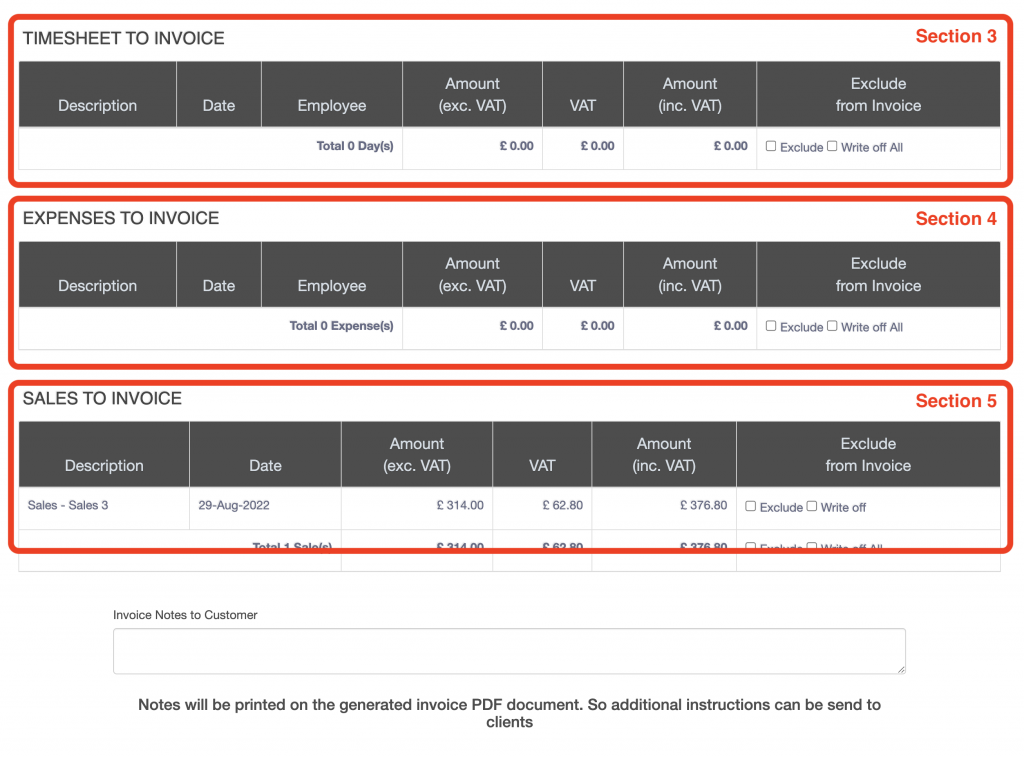
- Section 3, timesheet entries available to be invoiced
- Section 4, expenses available to be invoiced
- Section 5, sales available to be invoiced
Notes/comments to be added to the invoice to be sent to the client can be added at the bottom of the screen.
Steps to Raise an Invoice
Step 1, Select Project.
At the top of the screen select a client/project from the drop down box (outlined in red below).
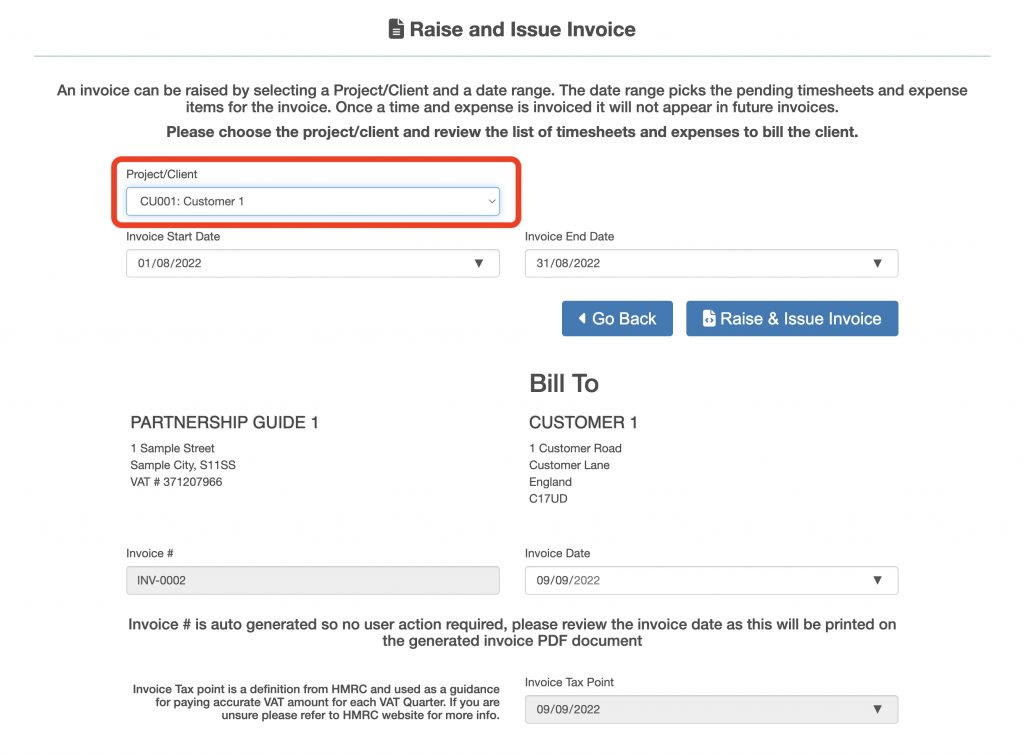
Step 2, Select Invoice Start and End Date
Below the project/client dropdown set the invoice start date and invoice end date (outlined in red below).

Step 3, Set the Invoice Date
Below the bill to address set the Invoice Date (defaults to todays date).
Step 4, Select Timesheet, Expenses and Sales to Invoice
The available timesheets, expenses and sales between the invoice start date and invoice end date is displayed.
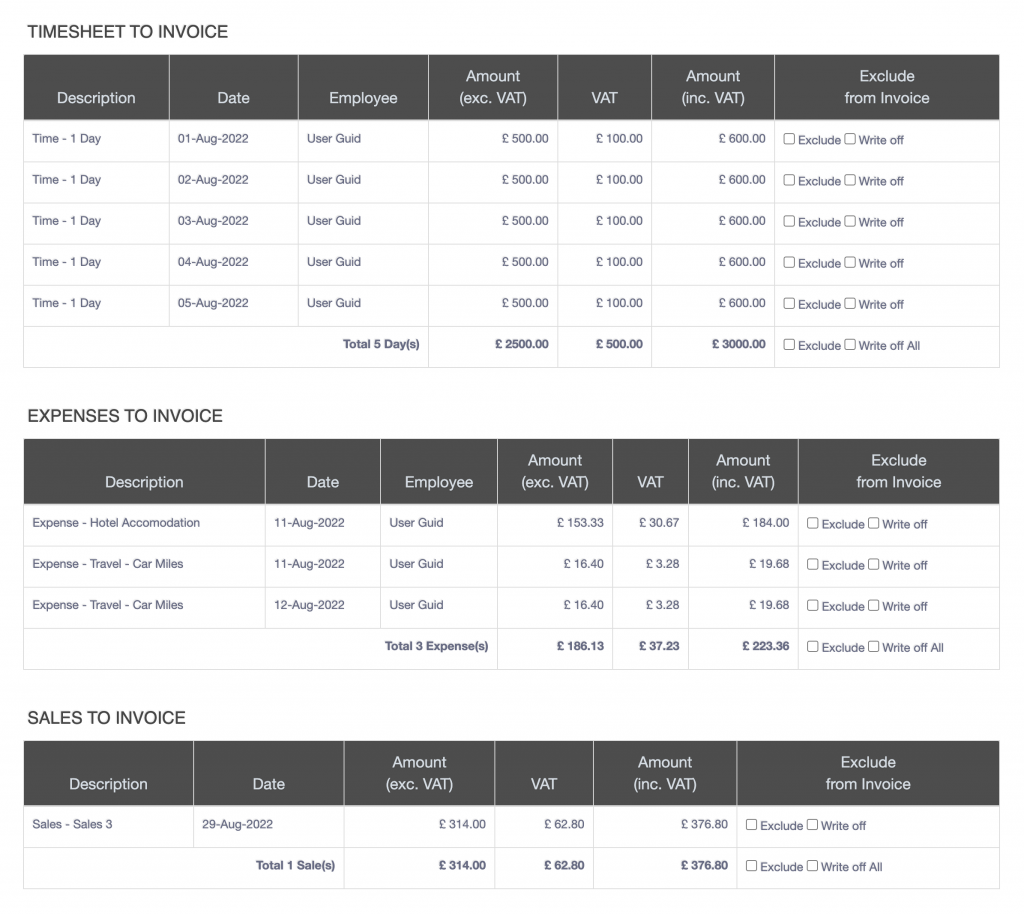
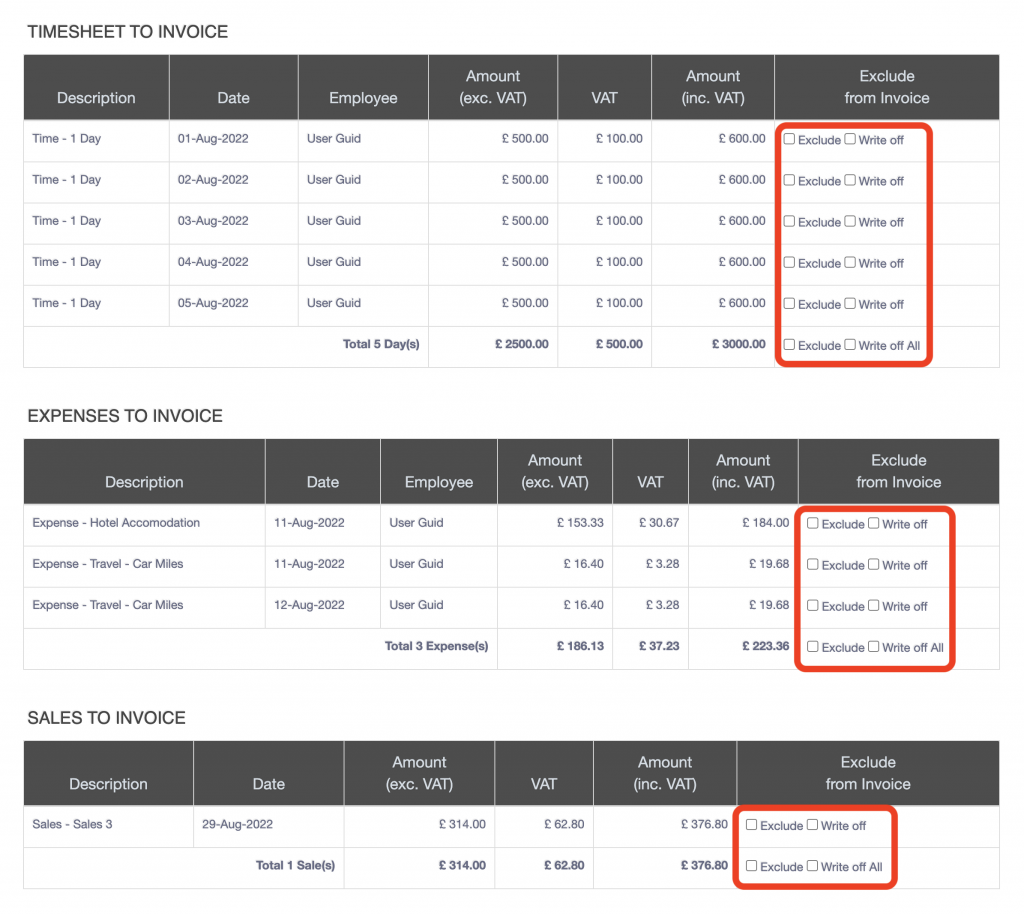
All items will be added to the invoice as default, to exclude items from the invoice select one of the following for each line to be excluded.
- Exclude, takes the item out of this invoice but leaves it available to be included in future invoices.
- Write off, takes the item out of this invoice and recognises the cost of the item to the business and stops the item being available for future invoices.
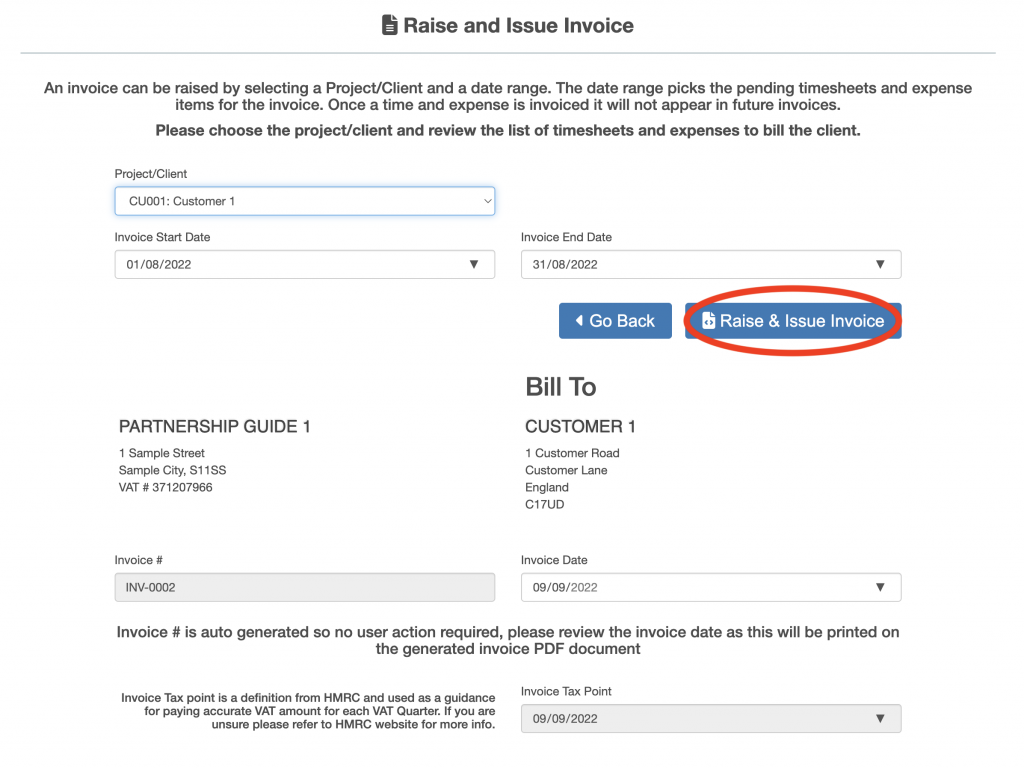
Once all items to be excluded have been selected and the list of items to be included is finalised. Then press the “Raise & Issue Invoice” button at the top of the screen.
Press the “Confirm” button on the confirmation screen.