Expenses User Guide – Add Expense Entry to Expense Claim
One or more expense entries can be added to an expense claim.
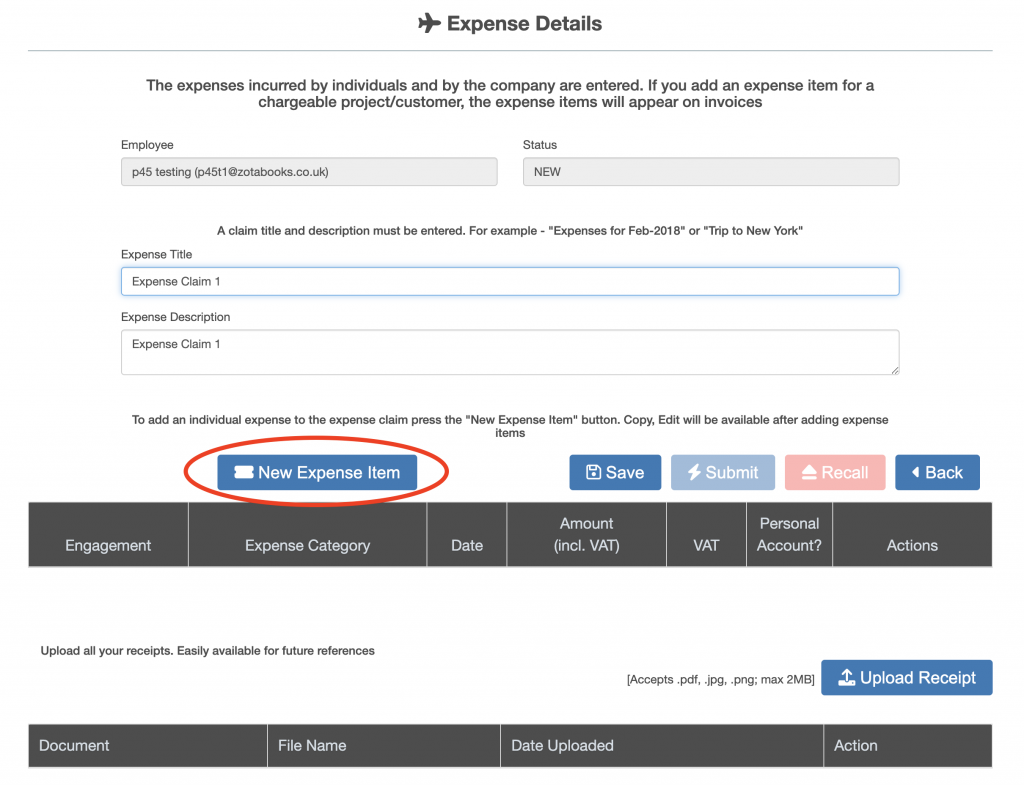
Adding an Expense Entry to an Expense Claim
Once the icon is clicked the expense claim opens, expense entries are added to the expense claim.
The expense entry for an item is displayed.
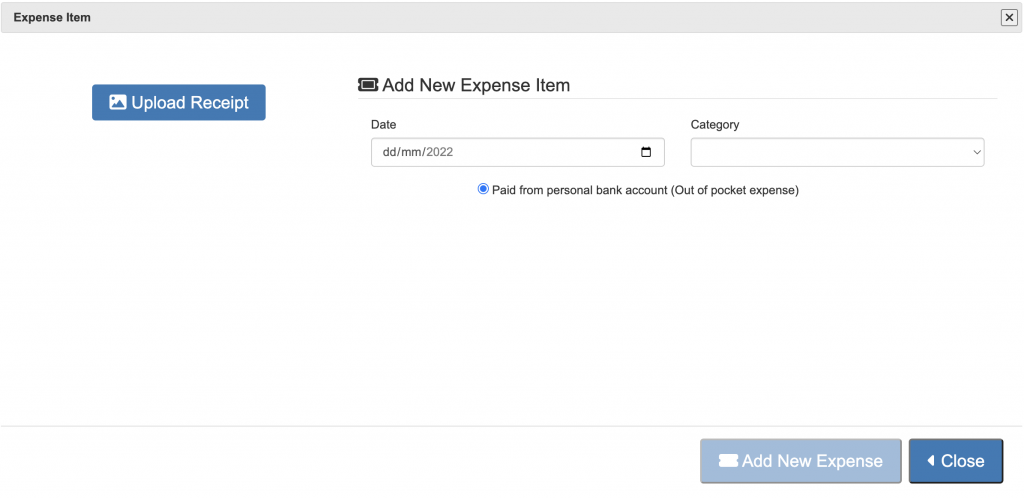
- Step 1, select a date from the drop down list, the date must be equal to or before today.
- Step 2, then select a category from the drop down list.
The category determines which additional information is to be collected and how the expense is treated for VAT.
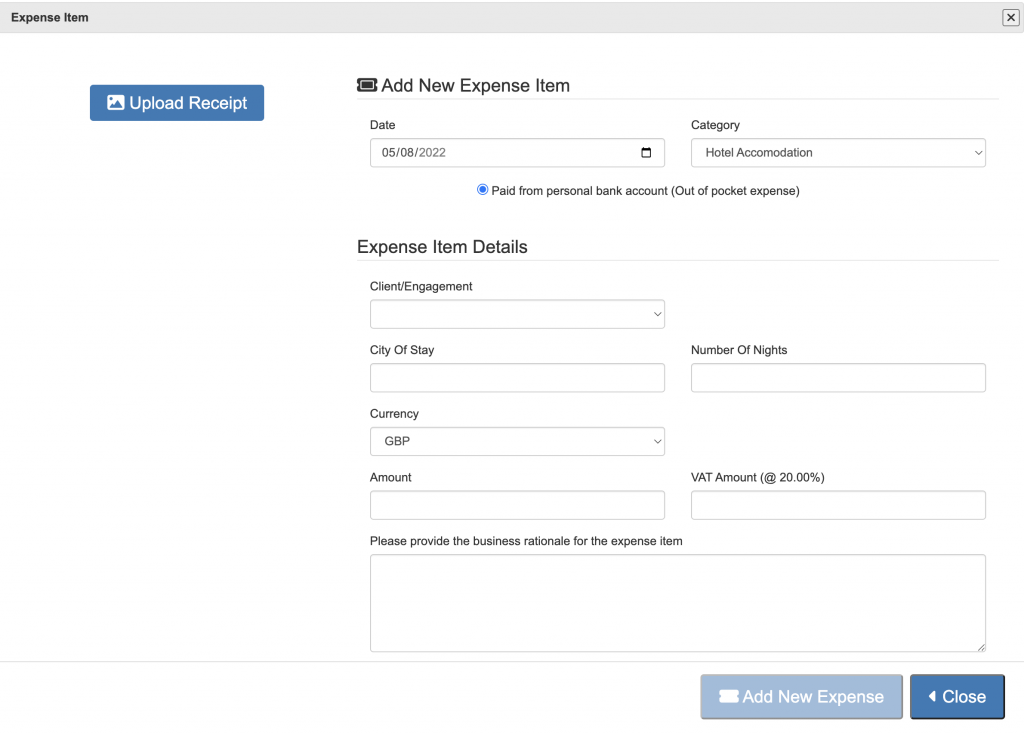
Complete the required information, the rationale is optional. To add an image of the receipt to the expense entry press the “Upload Receipt” button. An expense receipt can be added at a later date, and after submission of the expense claim.
Once the expense entry is completed press the “Add New Expense” button.
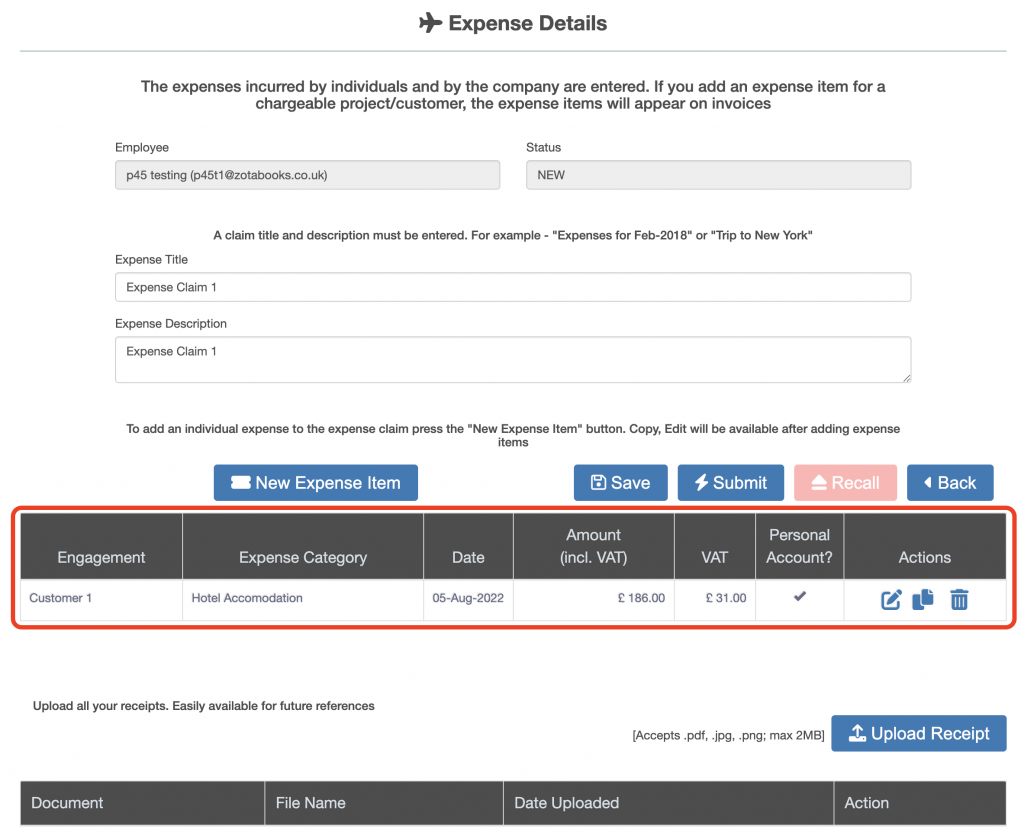
As many expense entries as required can be added to one expense claim. Repeat the process from pressing the “New Expense Item” button to add more expense entries to the expense claim.