Timesheet User Guide – Enter Timesheet
Timesheet enables an individual (member of staff) to record the hours they have spent working on projects, the projects can be:
- an internal non-client chargeable project code (e.g. vacation, training or other).
- a client chargeable code, which enables the cost of hours worked to be invoiced to a client.
Time entered in the timesheet is always assigned to a project code.
Step 1, Select Timesheet User and Week
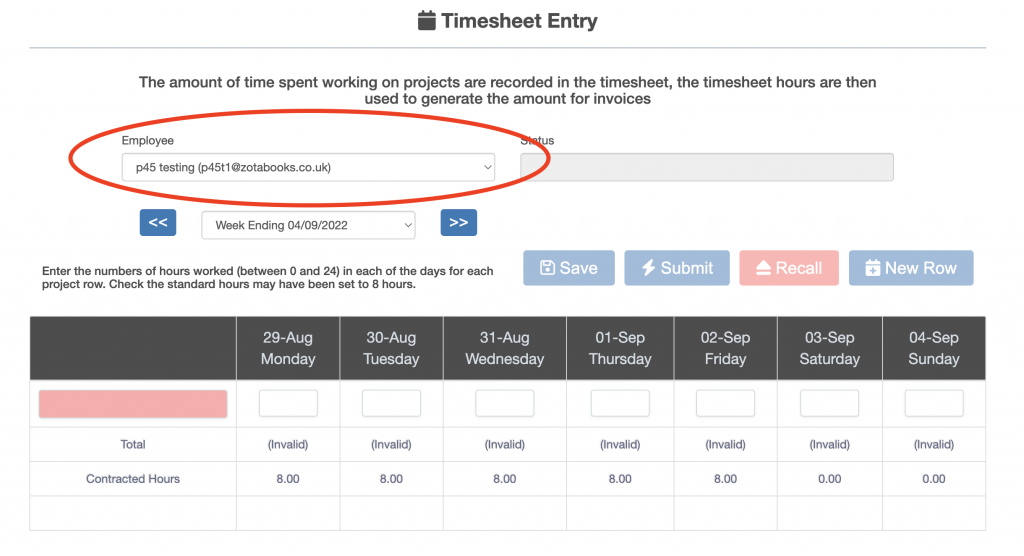
Timesheets are entered for one individual for a week at a time. To begin select the employee for which the timesheet is to be entered (circled in red below). Depending on access permissions an individual will either be able to selected their own name or from a list including their own name.
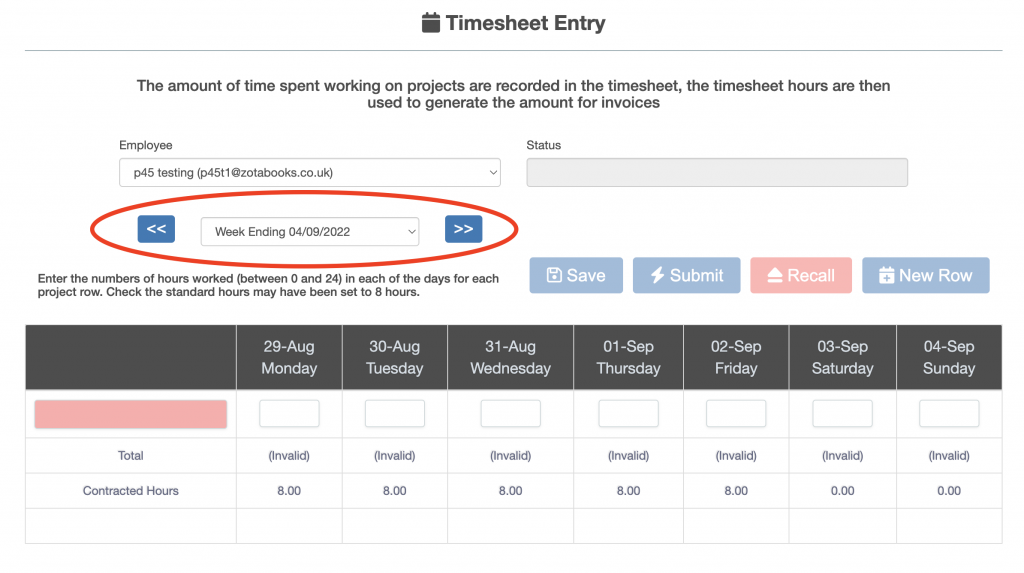
Next, select the week the timesheet is to be entered for. Either:
- Select from the drop down list, or
- use the back and forward buttons to the left and right of the date drop down box to select the required week.
See the red circle in the diagram below.
Step 2, Enter Hours Worked Against a Project
The table at the bottom of the page is where hours worked are entered against a project (outlined in red below).
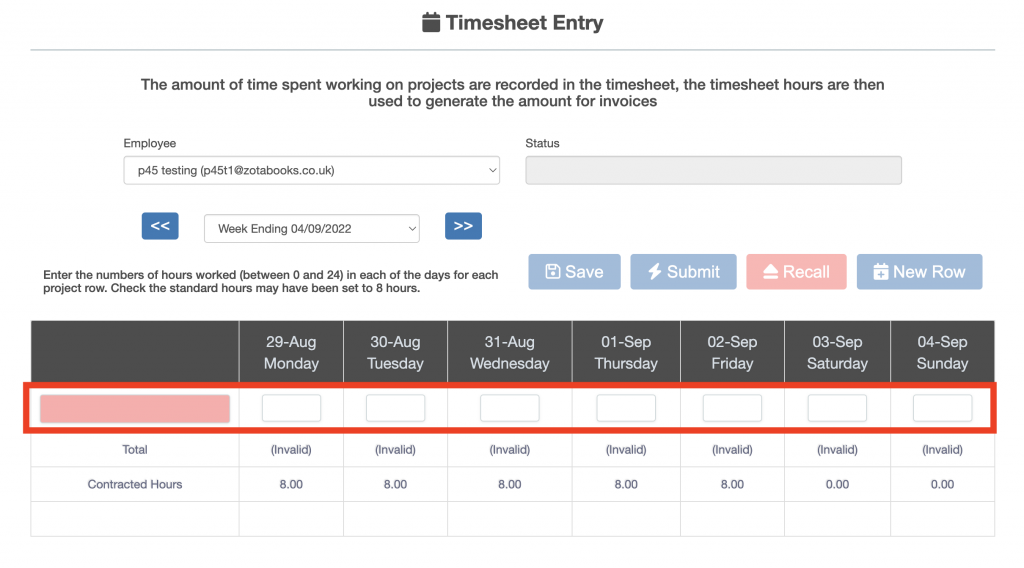
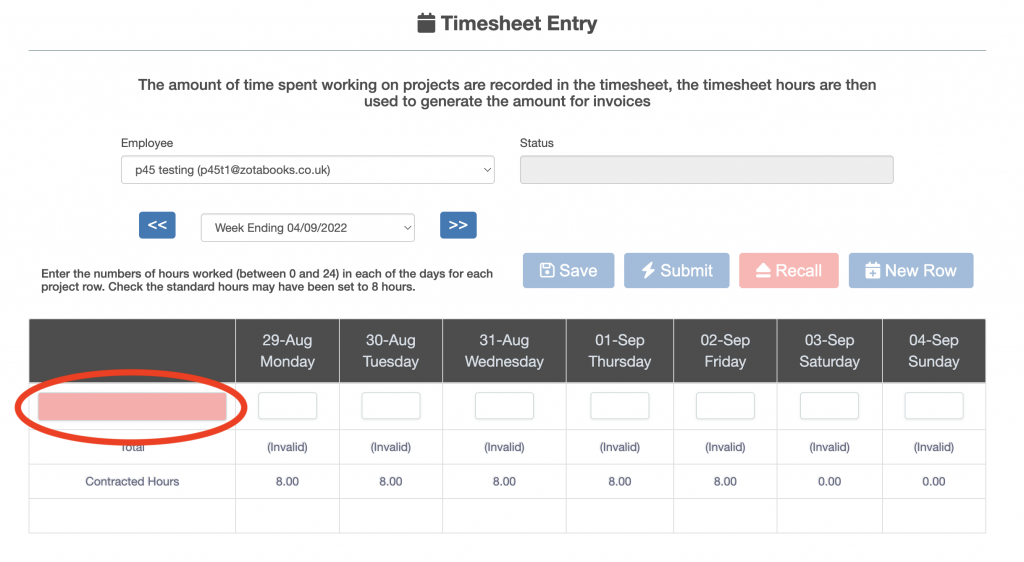
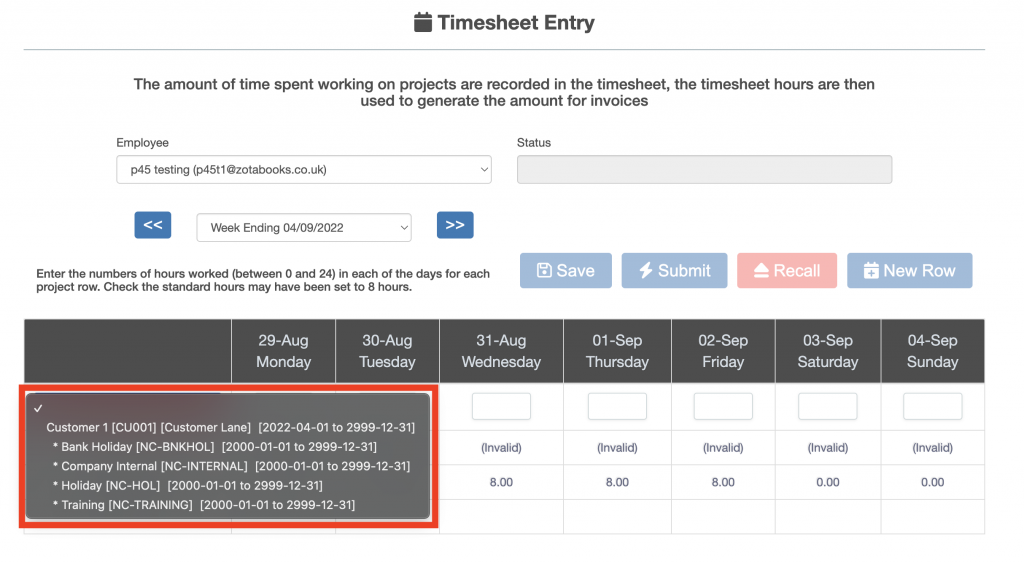
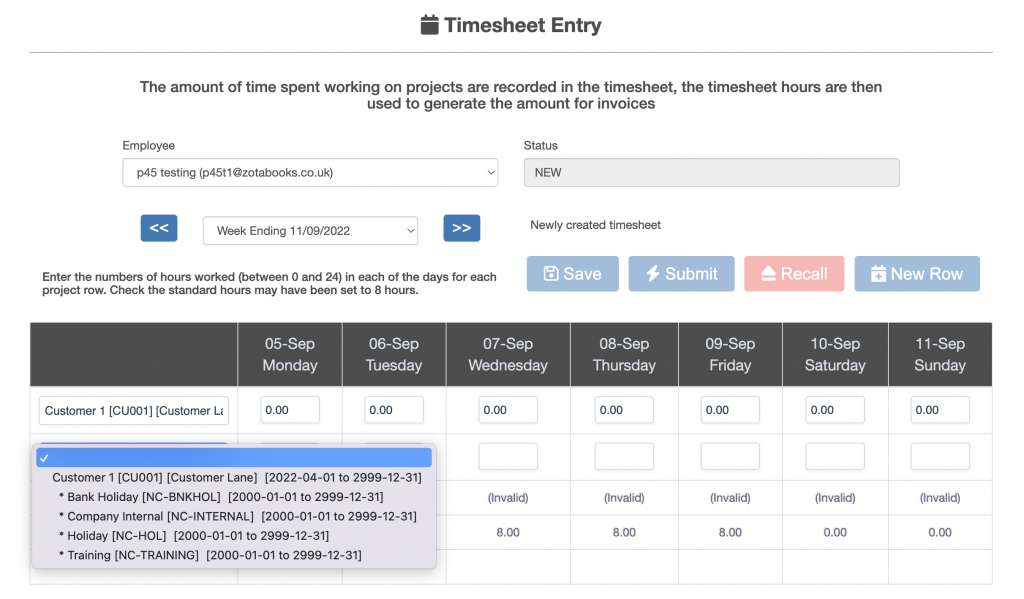
The left hand column is where the project is selected, click on the project selector in the blank line (circled in red below).
When the project selector is click on, a list of projects appears (outlined in red below). Projects preceded by a star are internal (non-client chargeable) projects, projects with no star are client chargeable projects.
Select a project from the drop down list. The contracted hours for each day are shown at the bottom of the timesheet entry (outlined in red below).

The total number of hours booked in the timesheet each day must be equal to or greater than the contracted hours. Enter hours against the project for each day of the week, where no hours are to be assigned to the project then either leave blank or enter zero.
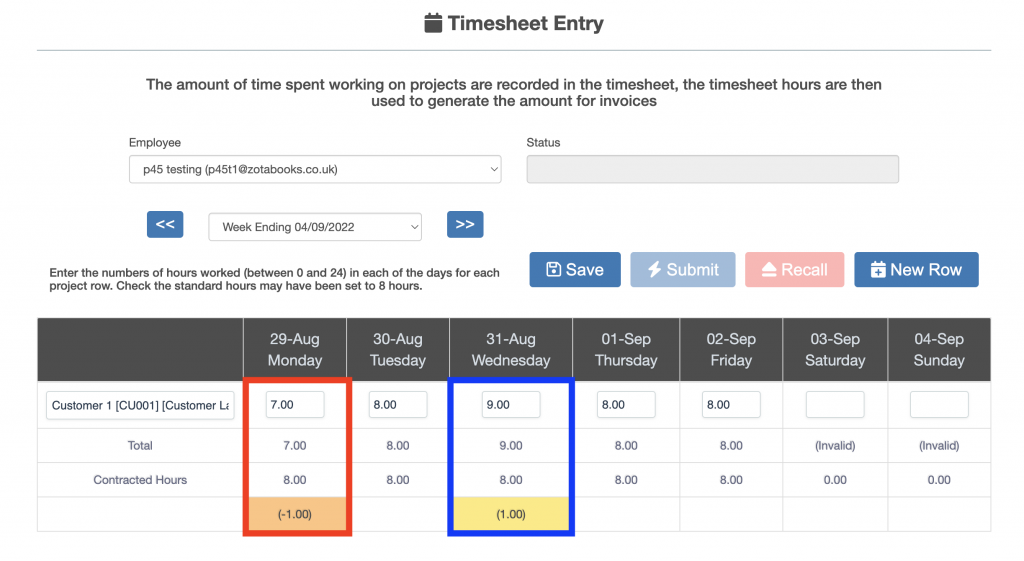
Where hours entered are less than the contracted hours this is indicated by the row below the contracted hours showing a negative number for the day which is shaded orange (see outline in red above). A timesheet cannot be submitted where one or more days have less hours entered than contracted.
Where hours entered are more than the contracted hours this is indicated by the row below the contracted hours showing a positive number for the day which is shaded yellow (see outlined in blue above). A timesheet can be submitted where one or more days have more hours entered than contracted.
The total number of hours which can be entered for a day is twenty four.
Step 3, Save and Submit Timesheet
The timesheet can be saved and edited later, the timesheet cannot be submitted until all the days have at least the contracted hours entered (where contracted hours is zero timesheet will default non-entered values to zero).
The “Save” button is always enabled. Press the “Save” button to save the hours entered, if the “Save” button is not pressed and the week is changed, or user changed or user navigates away from timesheet the hours will be lost.
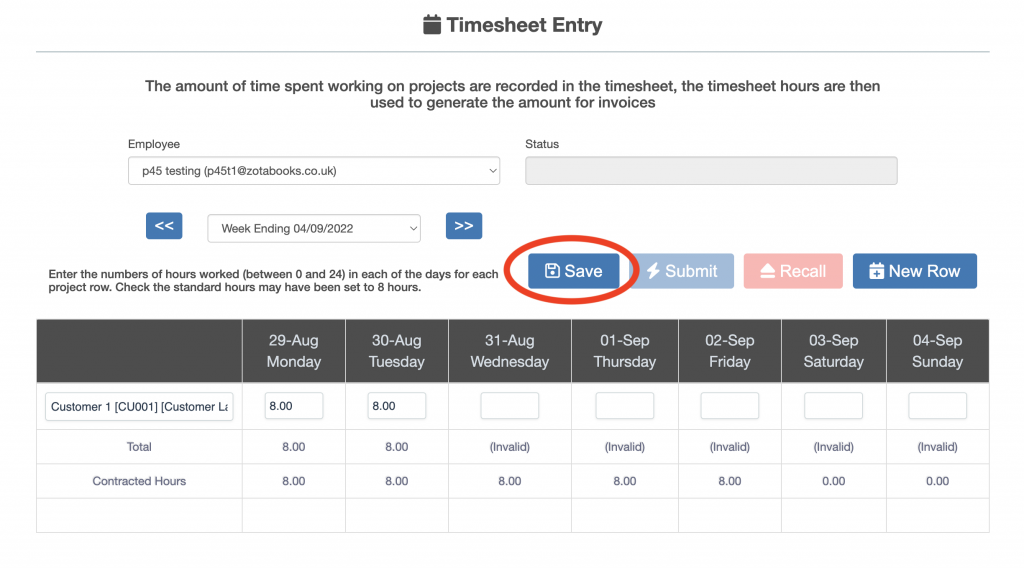
When the “Save” button is pressed and not all days have values entered, the non-entered values will default to zero (see circled outlined below).

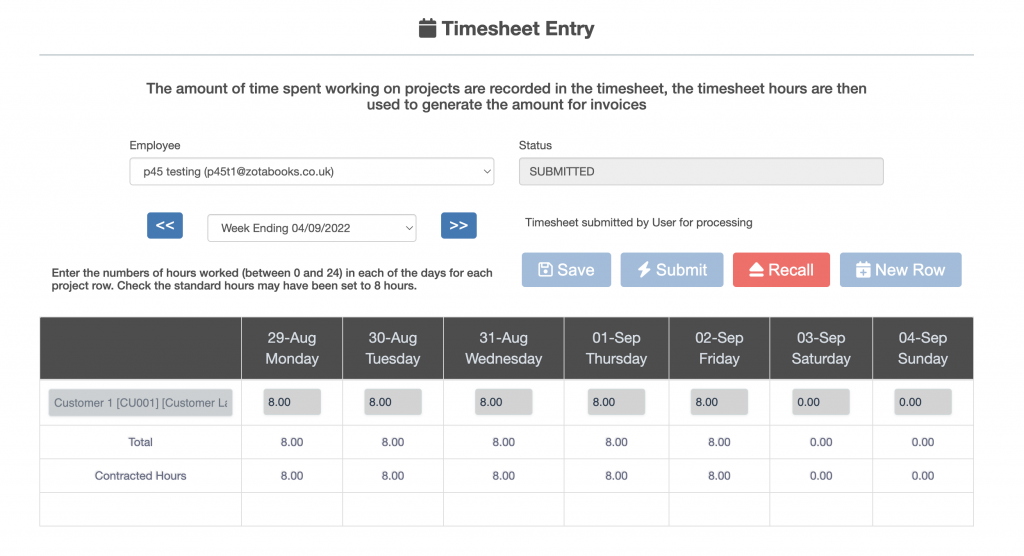
When all the days have at least the contracted hours entered, and the “Save” button has been pressed, the “Submit” button will become enabled (circled in red below).
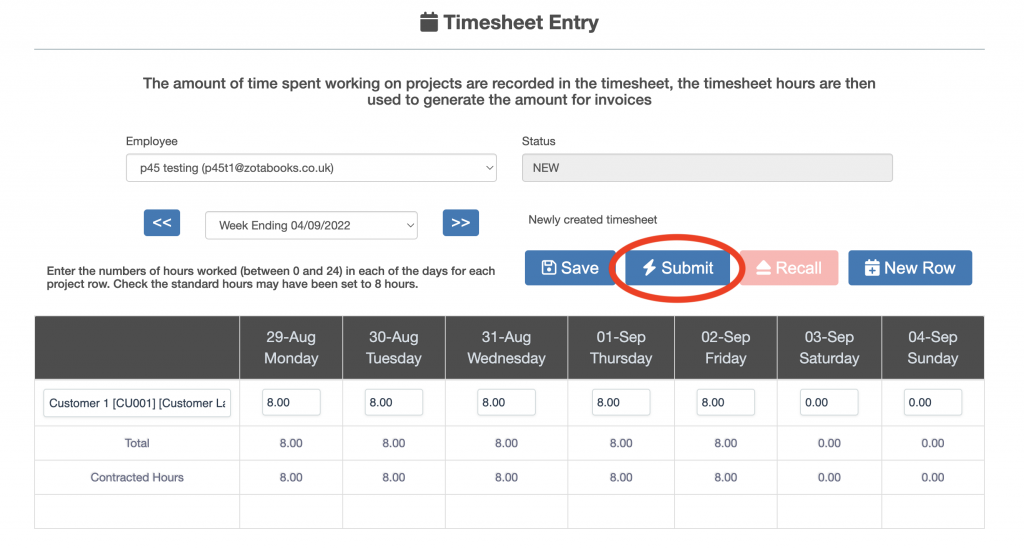
Pressing the “Submit” button will commit the timesheet and make any hours booked to a client chargeable code available for billing. Not submitting the timesheet will result in the hours entered into the timesheet not being recognised and any hours booked to a client chargeable code will not be available for billing.
Once the “Submit” button has been pressed, the timesheet for the user and week submitted will not be available for editing. The “Save” and “Submit” buttons will not be enabled, the “Recall” button will be enabled (see below).
Step 3, Entering Time for More than One Project in a Week
Yes, once one project has been entered the “New Row” button becomes enabled.
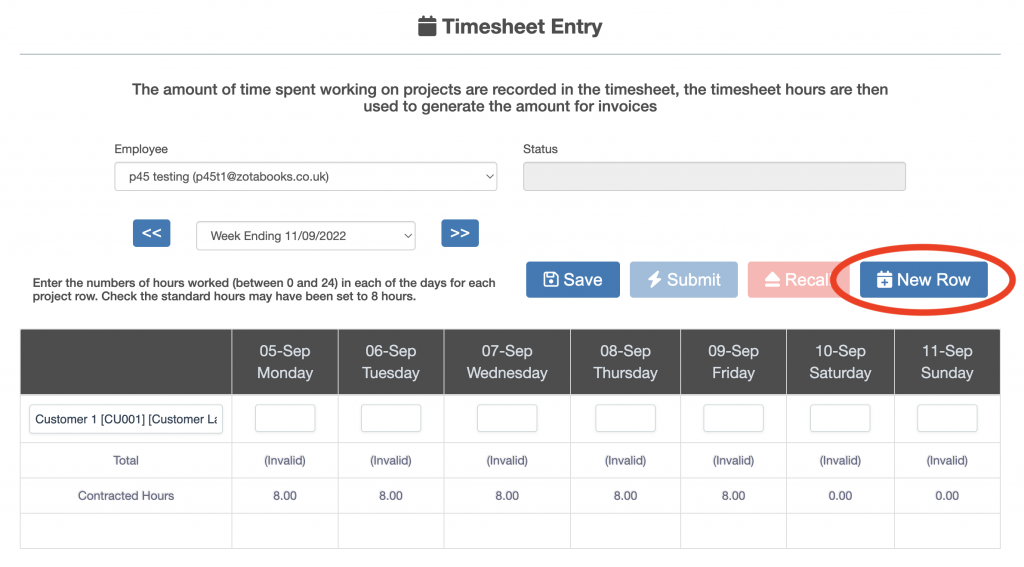
Press the “New Row” button to add a second row to the timesheet.
Select a project on the second row, the project entered on the second row must be different from that on the first row.
Additional rows can be added as required. The project entered for a row must be different from all other rows.