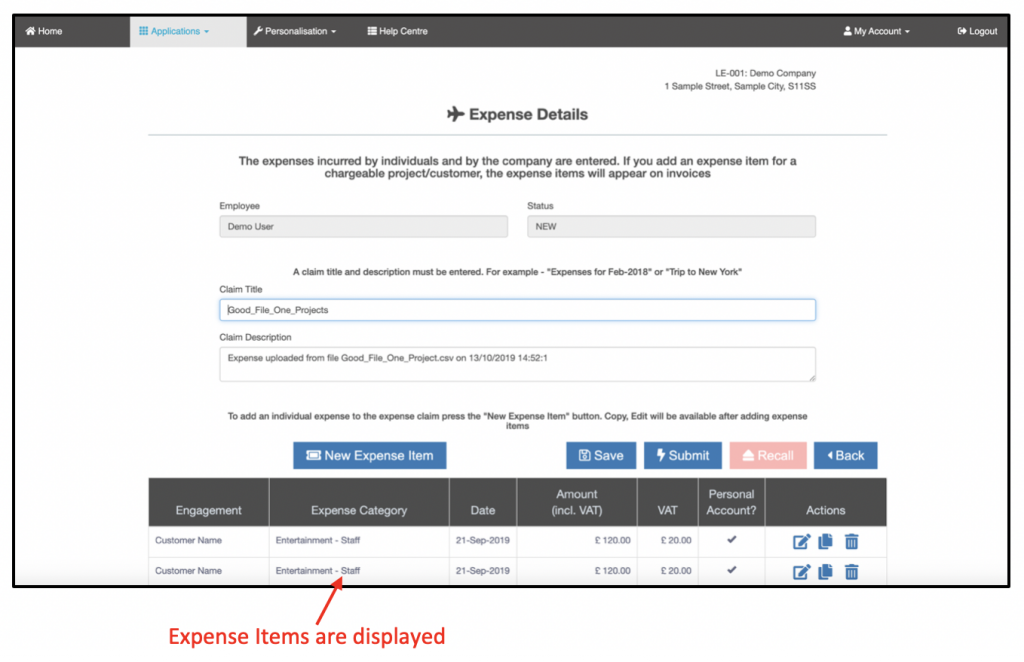
The “Upload Expense File” button allows one or more expense items to be uploaded from an external file. The file must be in the correct format.
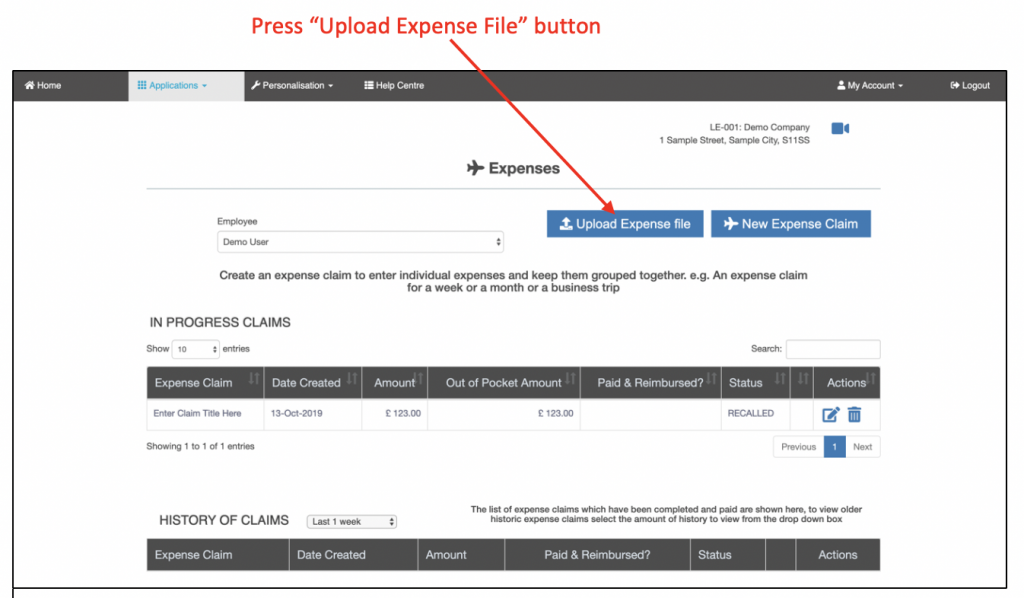
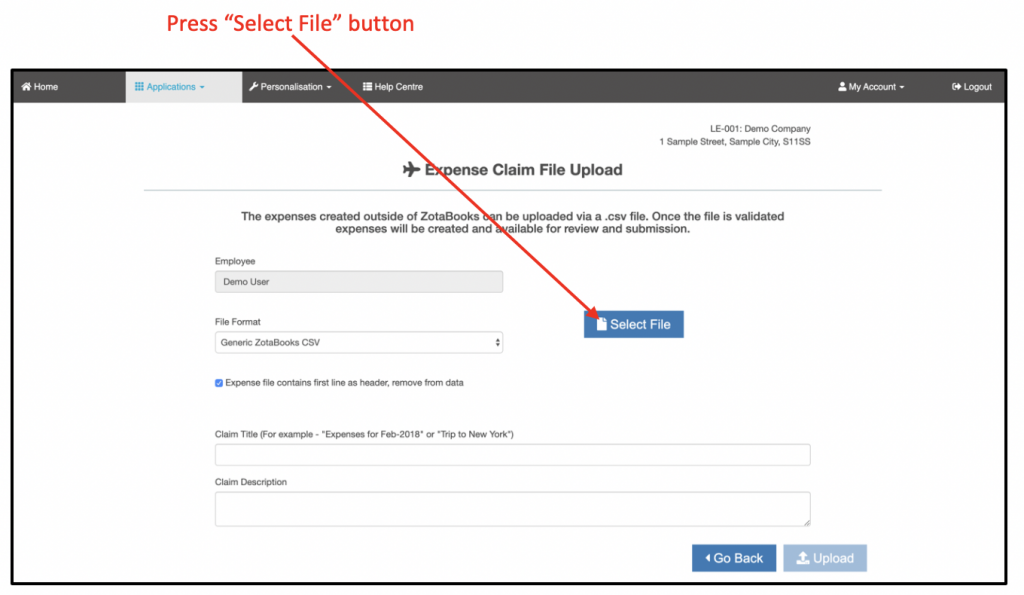
The upload screen is displayed:
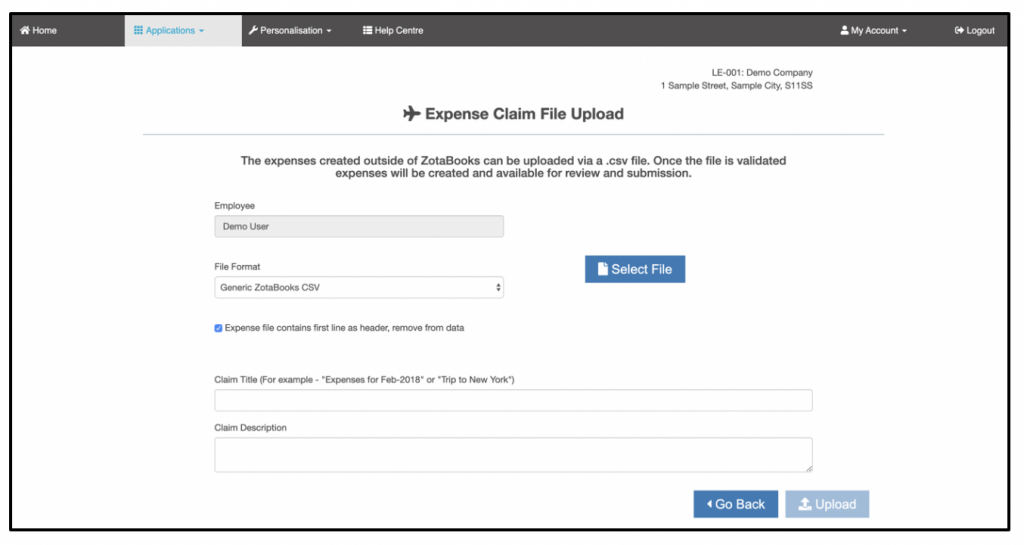
Select a File Format
ZotaBooks can accept file uploads from multiple sources, select the appropriate source of the file to be uploaded.
Selecting an Expense File
The expense file to be uploaded is selected using the “Select File” button.
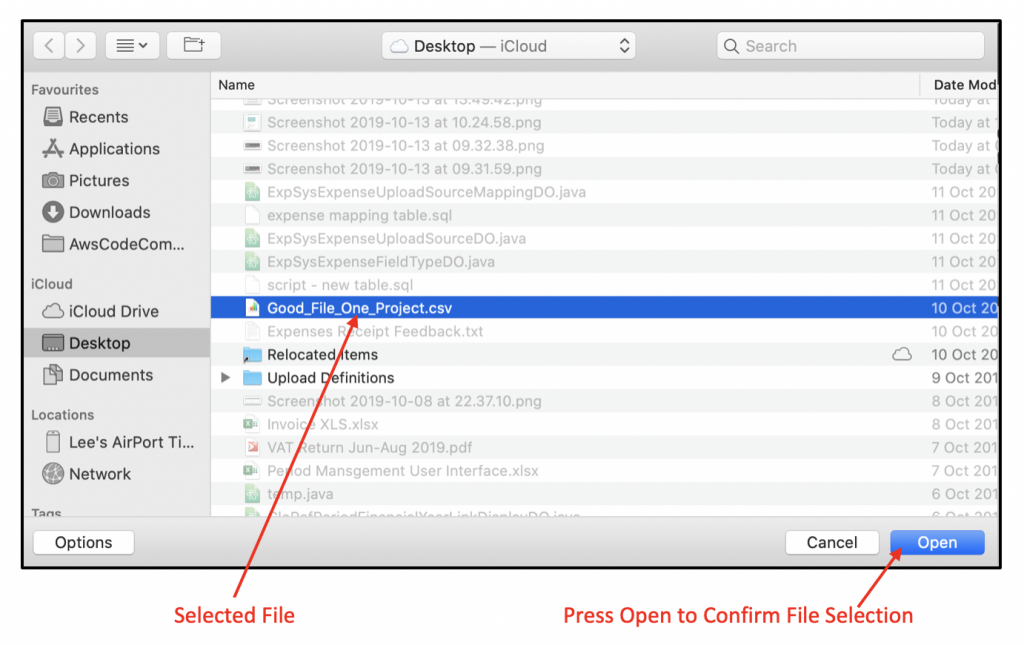
On pressing the “Select File” button a dialog box is displayed which allows the user to select the expense file for upload.
File Format Mapping
When a file format other than “ZotaBooks CSV Format” is selected the option to undertake mappings for expense category, project and currency is provided to the end users. Where these values are identical between source and ZotaBooks the mappings need no action, only where values are different do mappings have to be undertaken.
Validating the Expense File
Once the file is selected, the file is automatically validated, any errors are displayed on the screen.
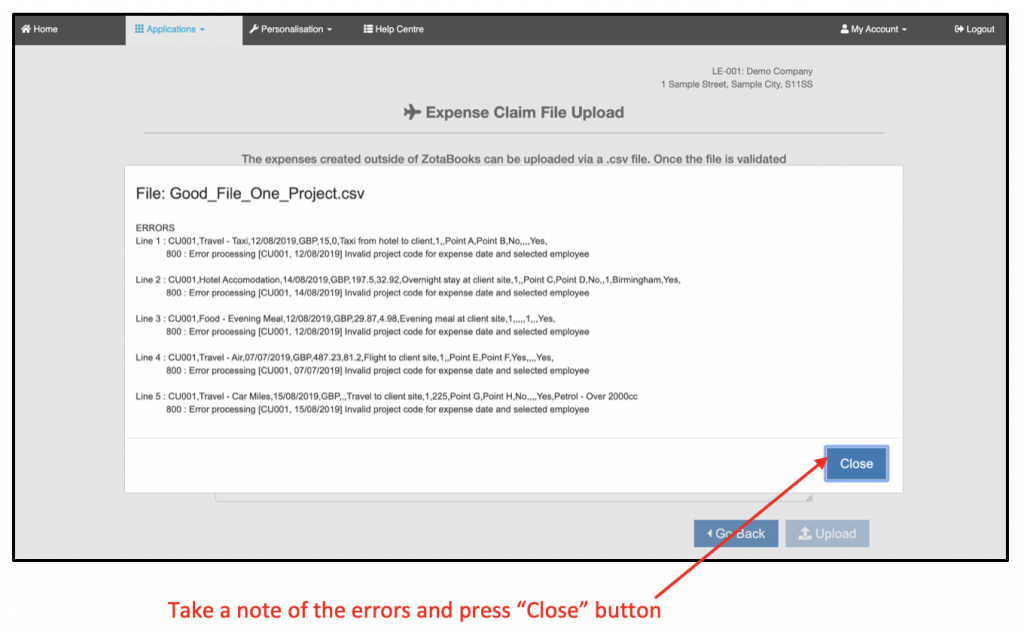
The upload screen is displayed with a red error message, and the “Upload” button is disabled.
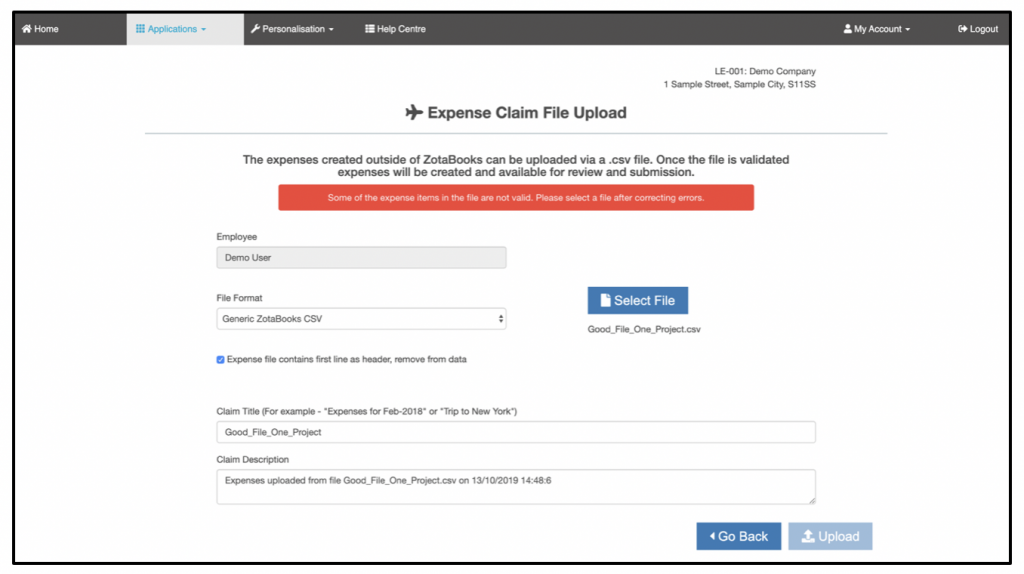
Correct the file and retry the upload, once all errors have been corrected a green message is displayed confirming the file is valid. The “Upload” button is enabled:
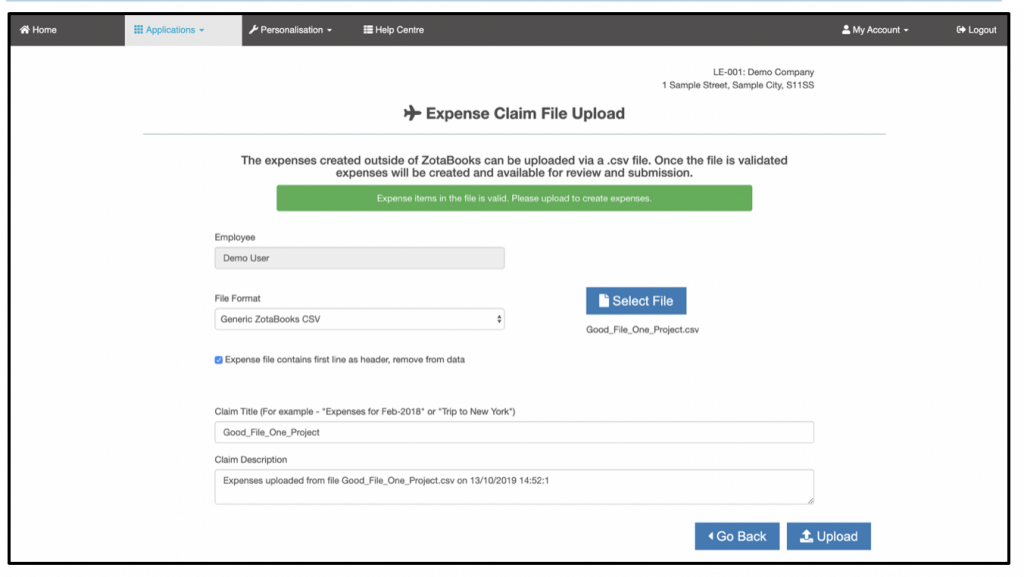
An expense title and description are automatically created, these can be edited prior to uploading the expense items.
Uploading the Expense File
Once the file has been validated, the “Upload” button is enabled. Press the “Upload” button and the expenses file is uploaded into ZotaBooks, a new expense claim is created for the uploaded expense items.
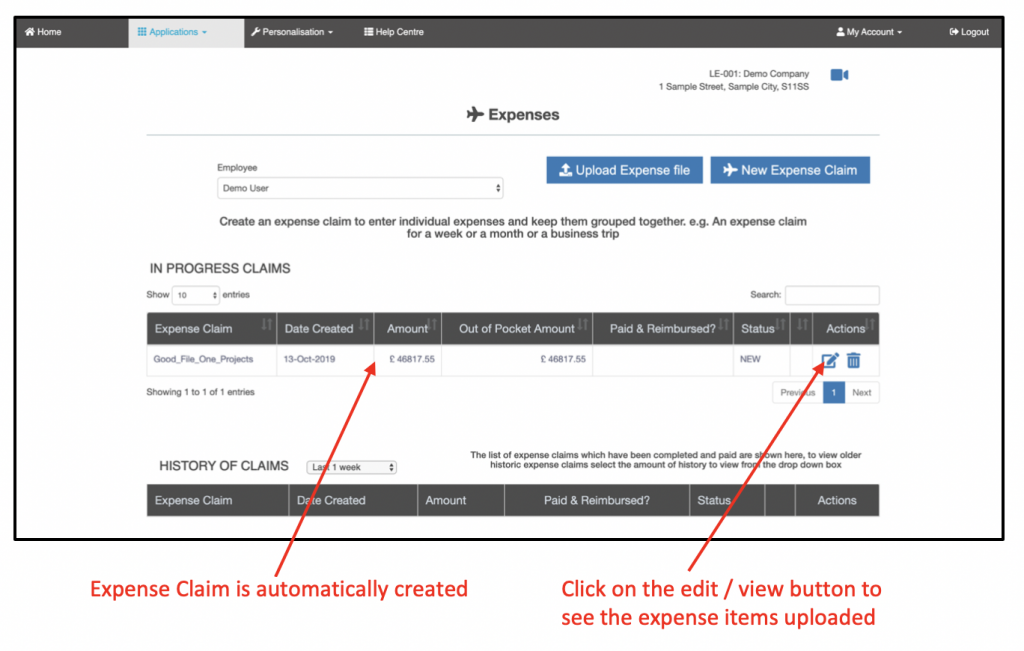
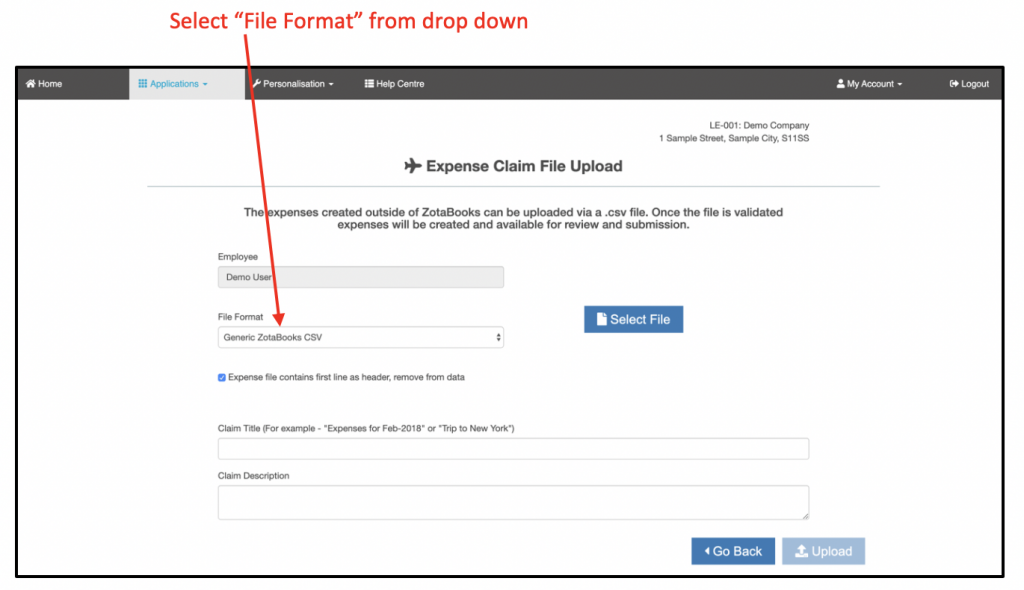
To view the expense items in the expense claim press the “Edit / View” claim icon. The uploaded expense items are displayed.
